This week’s Cork to Fork is starting off August right as we cheers to our featured Wine of the Month with Albariño! (In case you haven’t heard, it’s also 10% off right now – so – do yourself a favor and grab a couple bottles at the tasting room).
Risotto alla Nerano

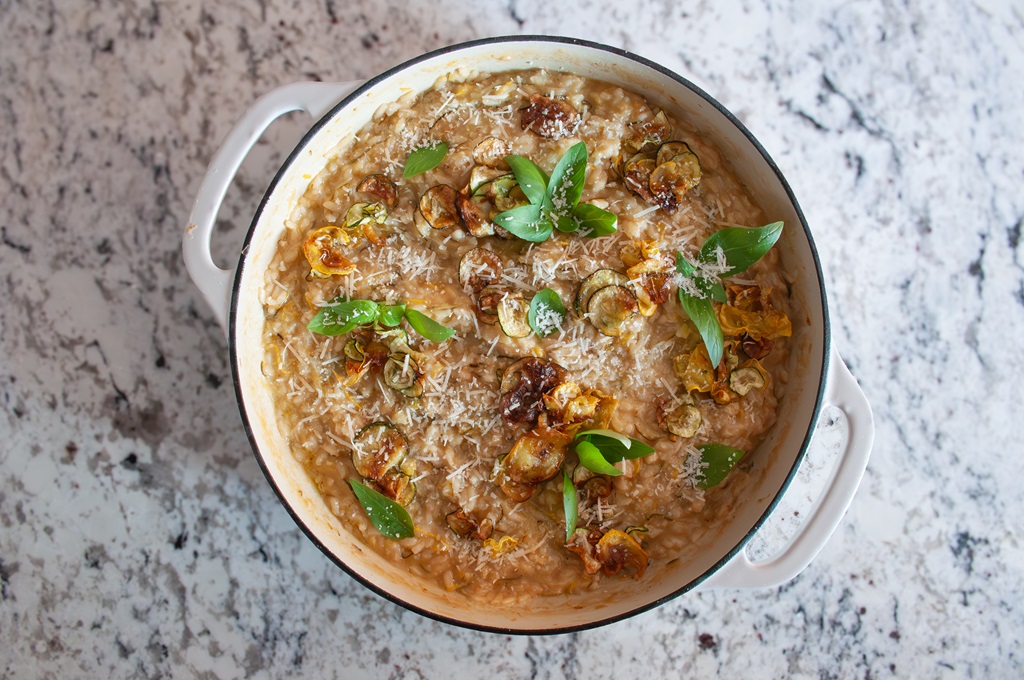
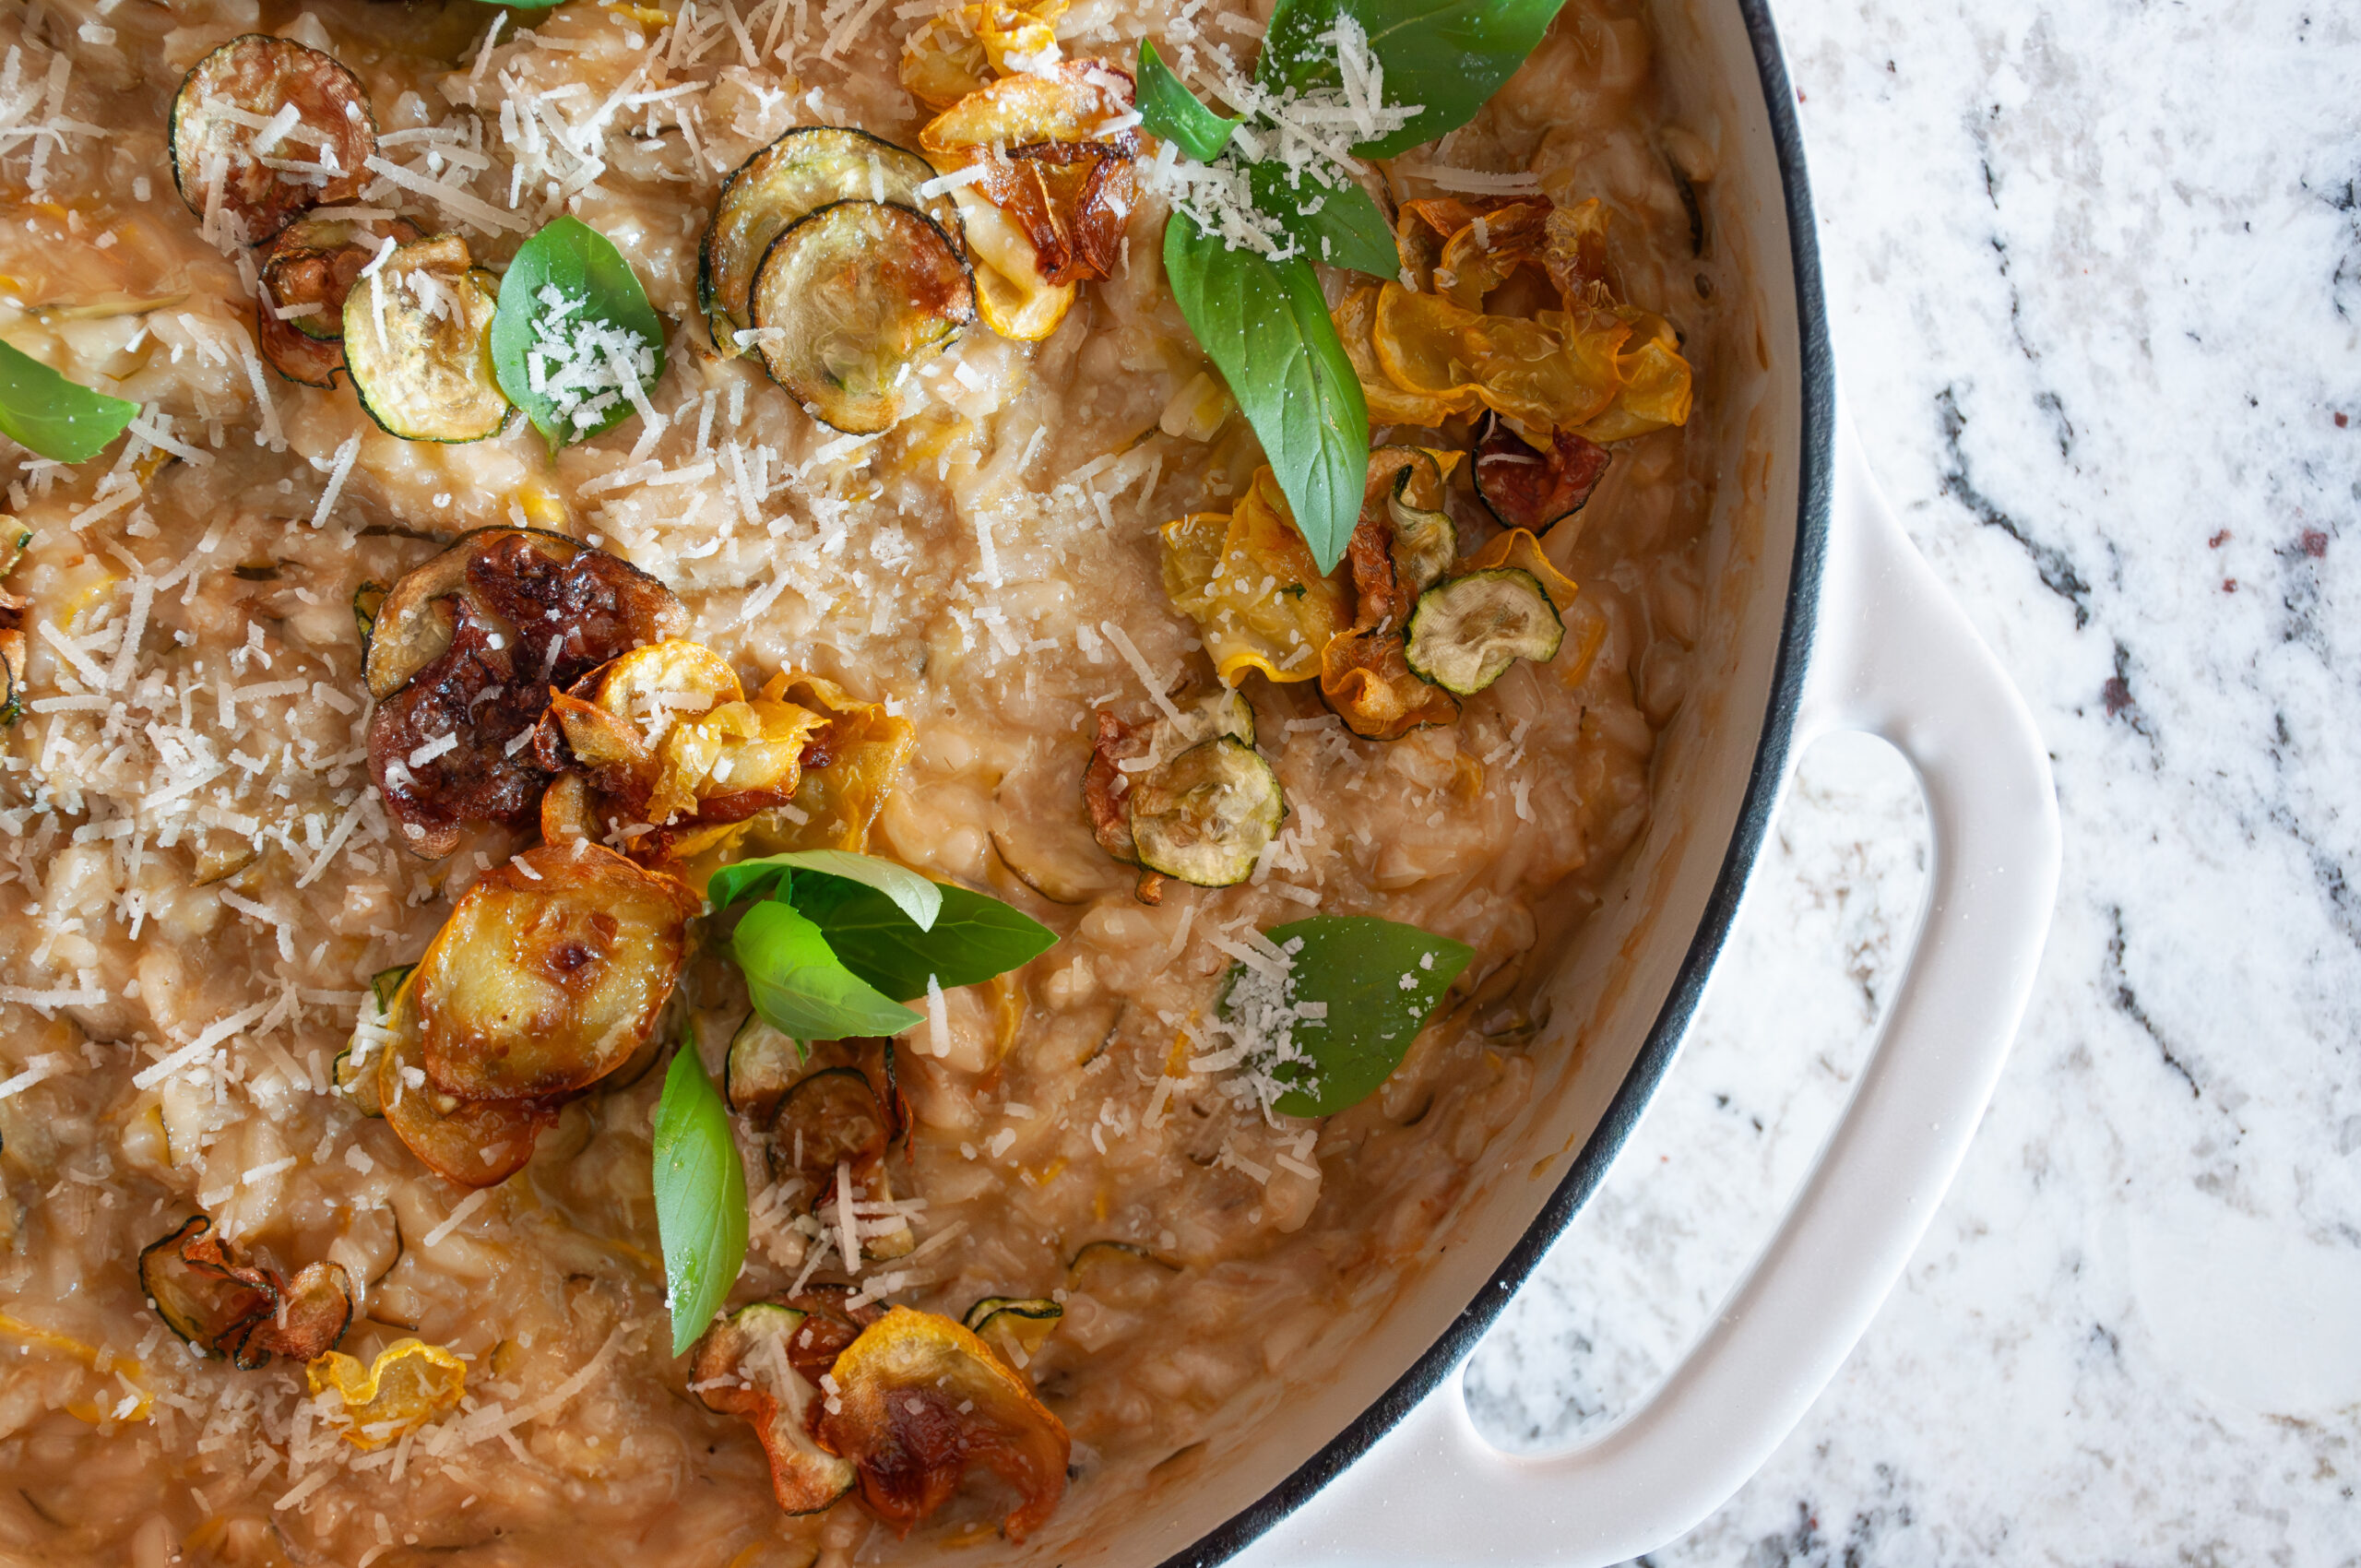
The star of this risotto is zucchini. A summer vegetable with basically no flavor at all, delicate in texture, but lots of potential. It’s highlighted in a unique way by frying, cooling, then incorporating into a velvety risotto with shallot, garlic, parmesan, and basil. When you take your first bite it is heaven. Let’s begin!
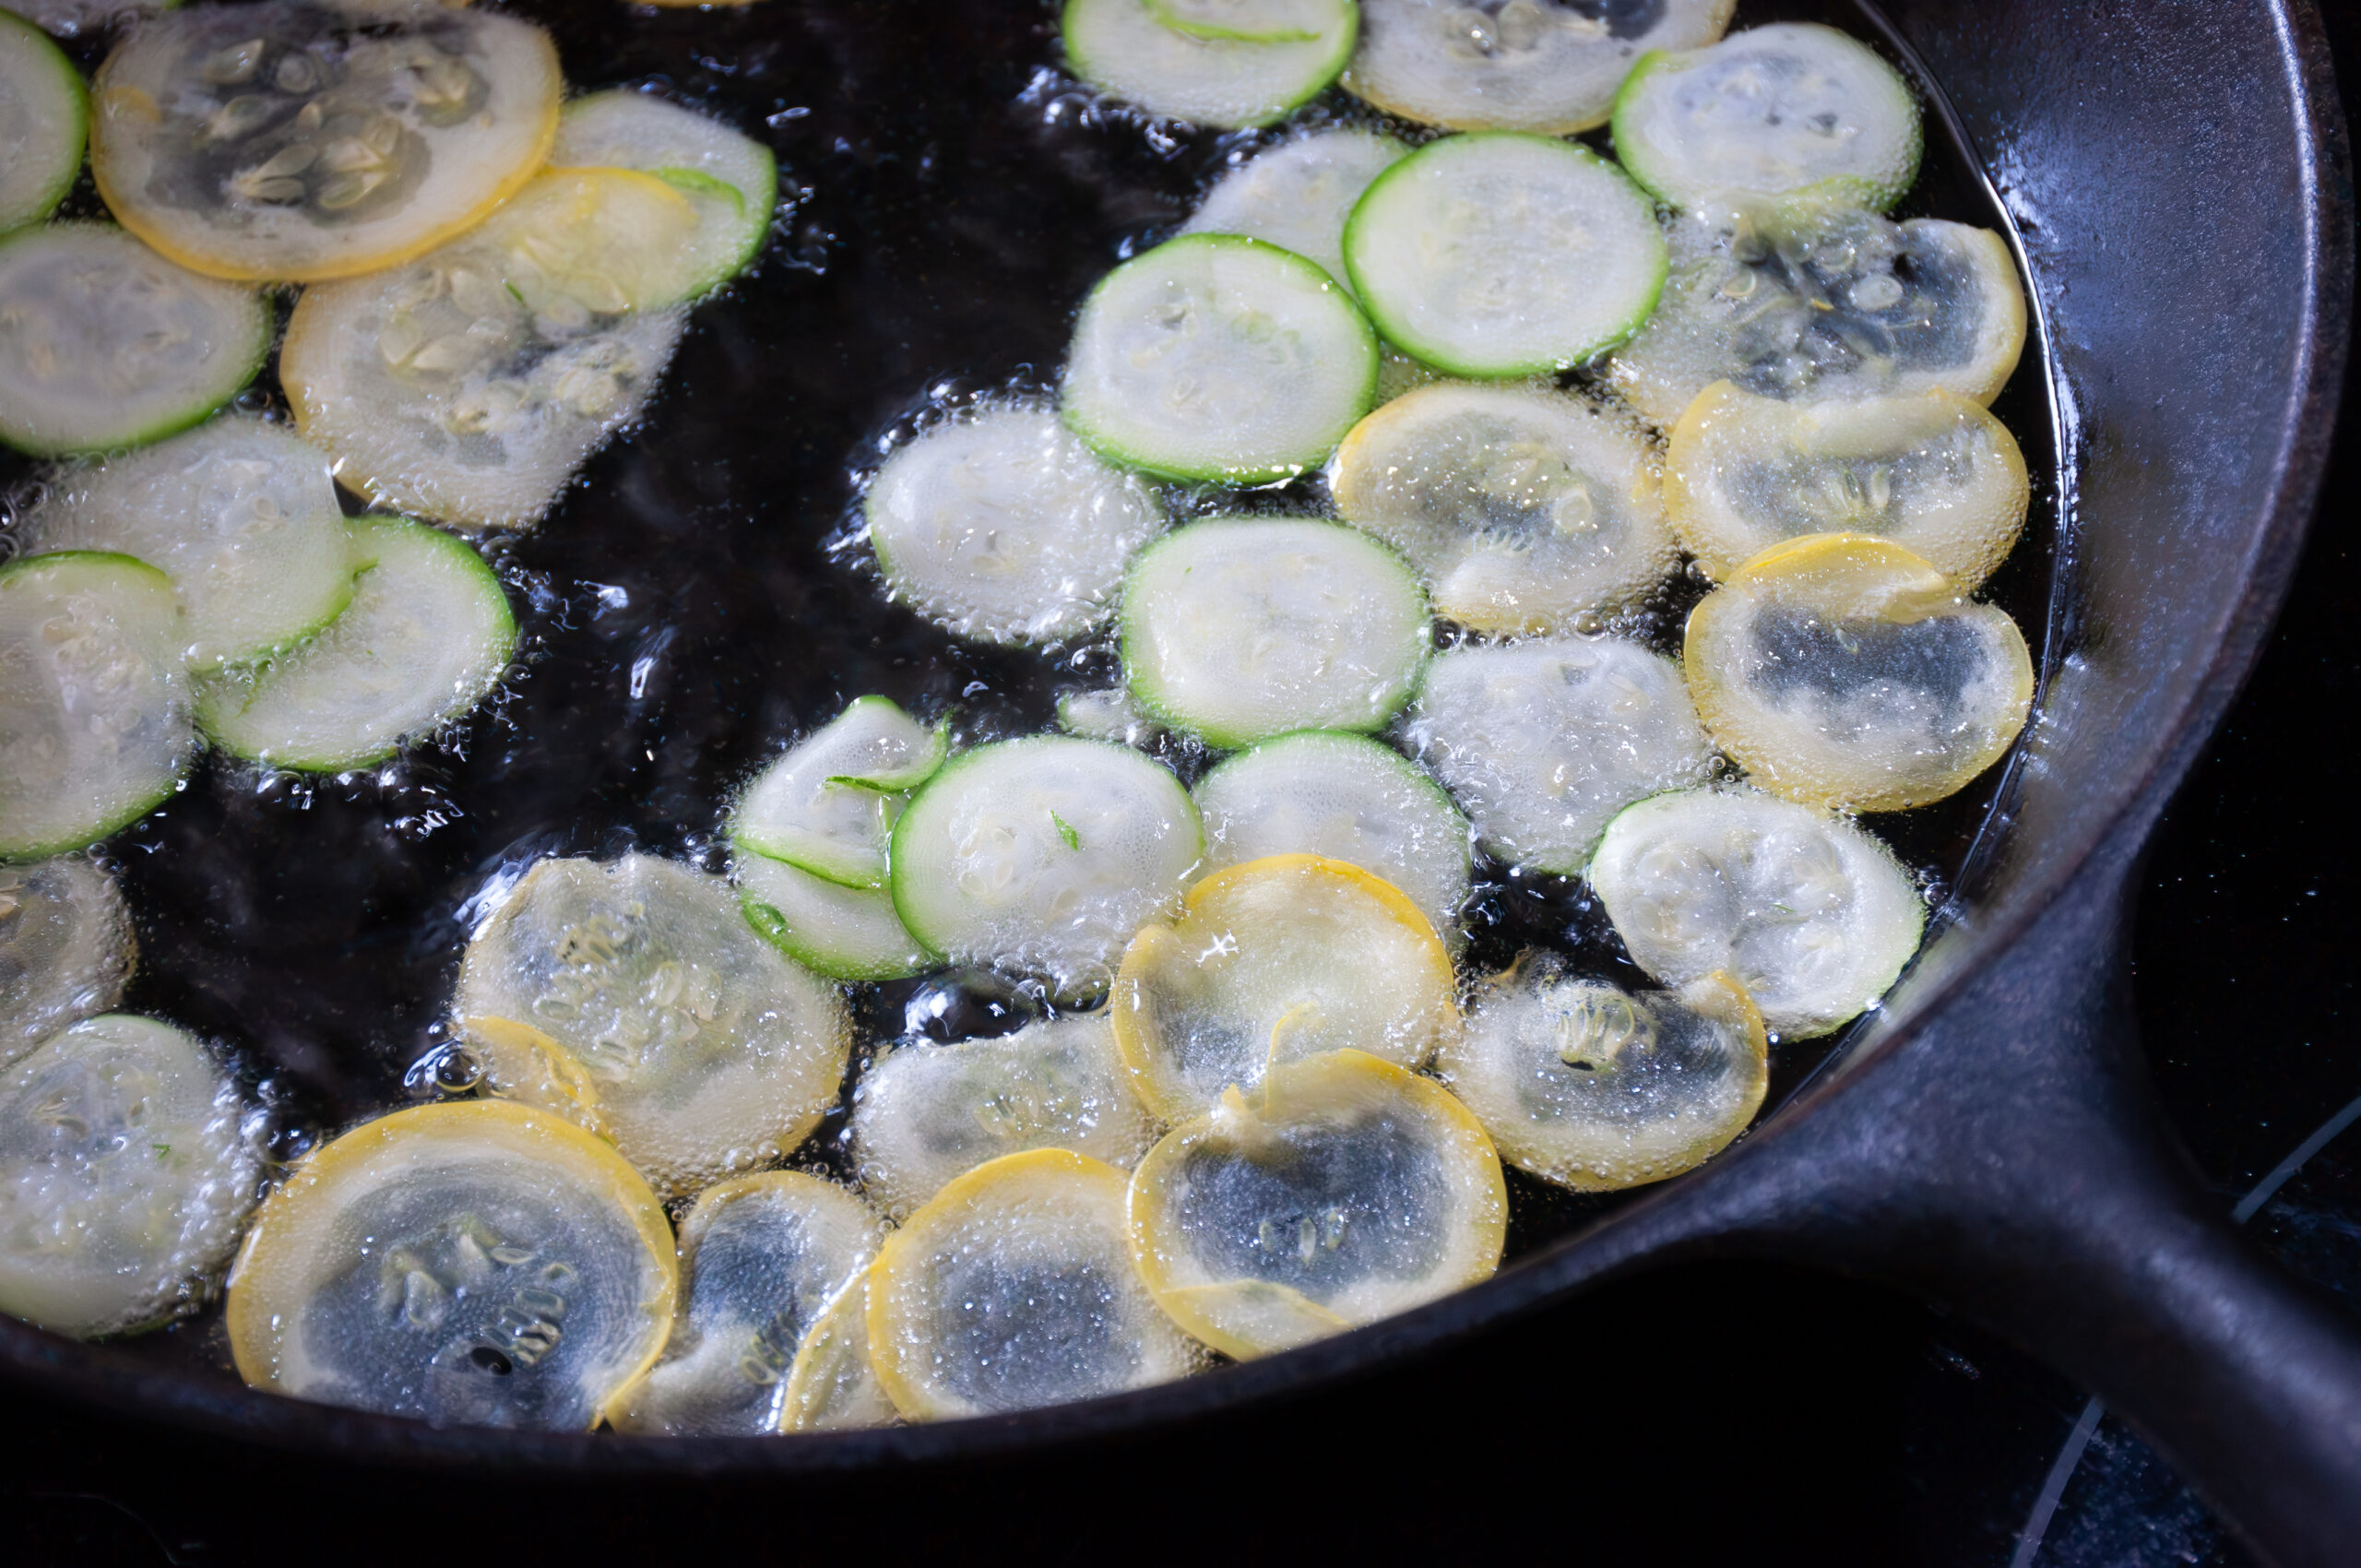
 Grab either a cast iron pan, a Dutch oven, or a deep fryer and fill it with Sunflower or Safflower oil. It has a high smoke point and completely neutral flavor. I used a cast iron pan with high side walls and put about two inches worth of oil in the pan. I turned the heat on medium/low and let time do its thing.
With either a mandolin or the knife skills of Gordon Ramsey, slice your zucchini into thin rounds. If it seems like you have a mountain of zucchini and that you couldn’t possibly consume all that’s before you – zip that lip. It’s going to basically disappear. I used 5 zucchinis and once the frying was complete I was left with about a cup and three-quarters of fried zucchini goodness. You want a nice golden color on them, too, and that medium to low temp on your stove should be able to produce that just fine with a little patience.
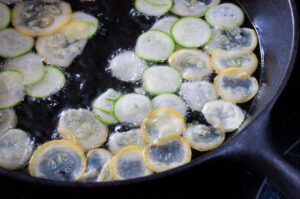
Here’s a plot twist for this recipe: put it in a bowl, cover with plastic wrap, and stick it in your fridge overnight. Or at least 8 hours. You want to fry these and then let them soften. It’s all a part of the process.
If you’ve made risotto before, the remainder of this recipe will all be very intuitive. If you’ve never made risotto before, I promise you it’s nowhere near as complicated as you might assume – it simply takes patience.
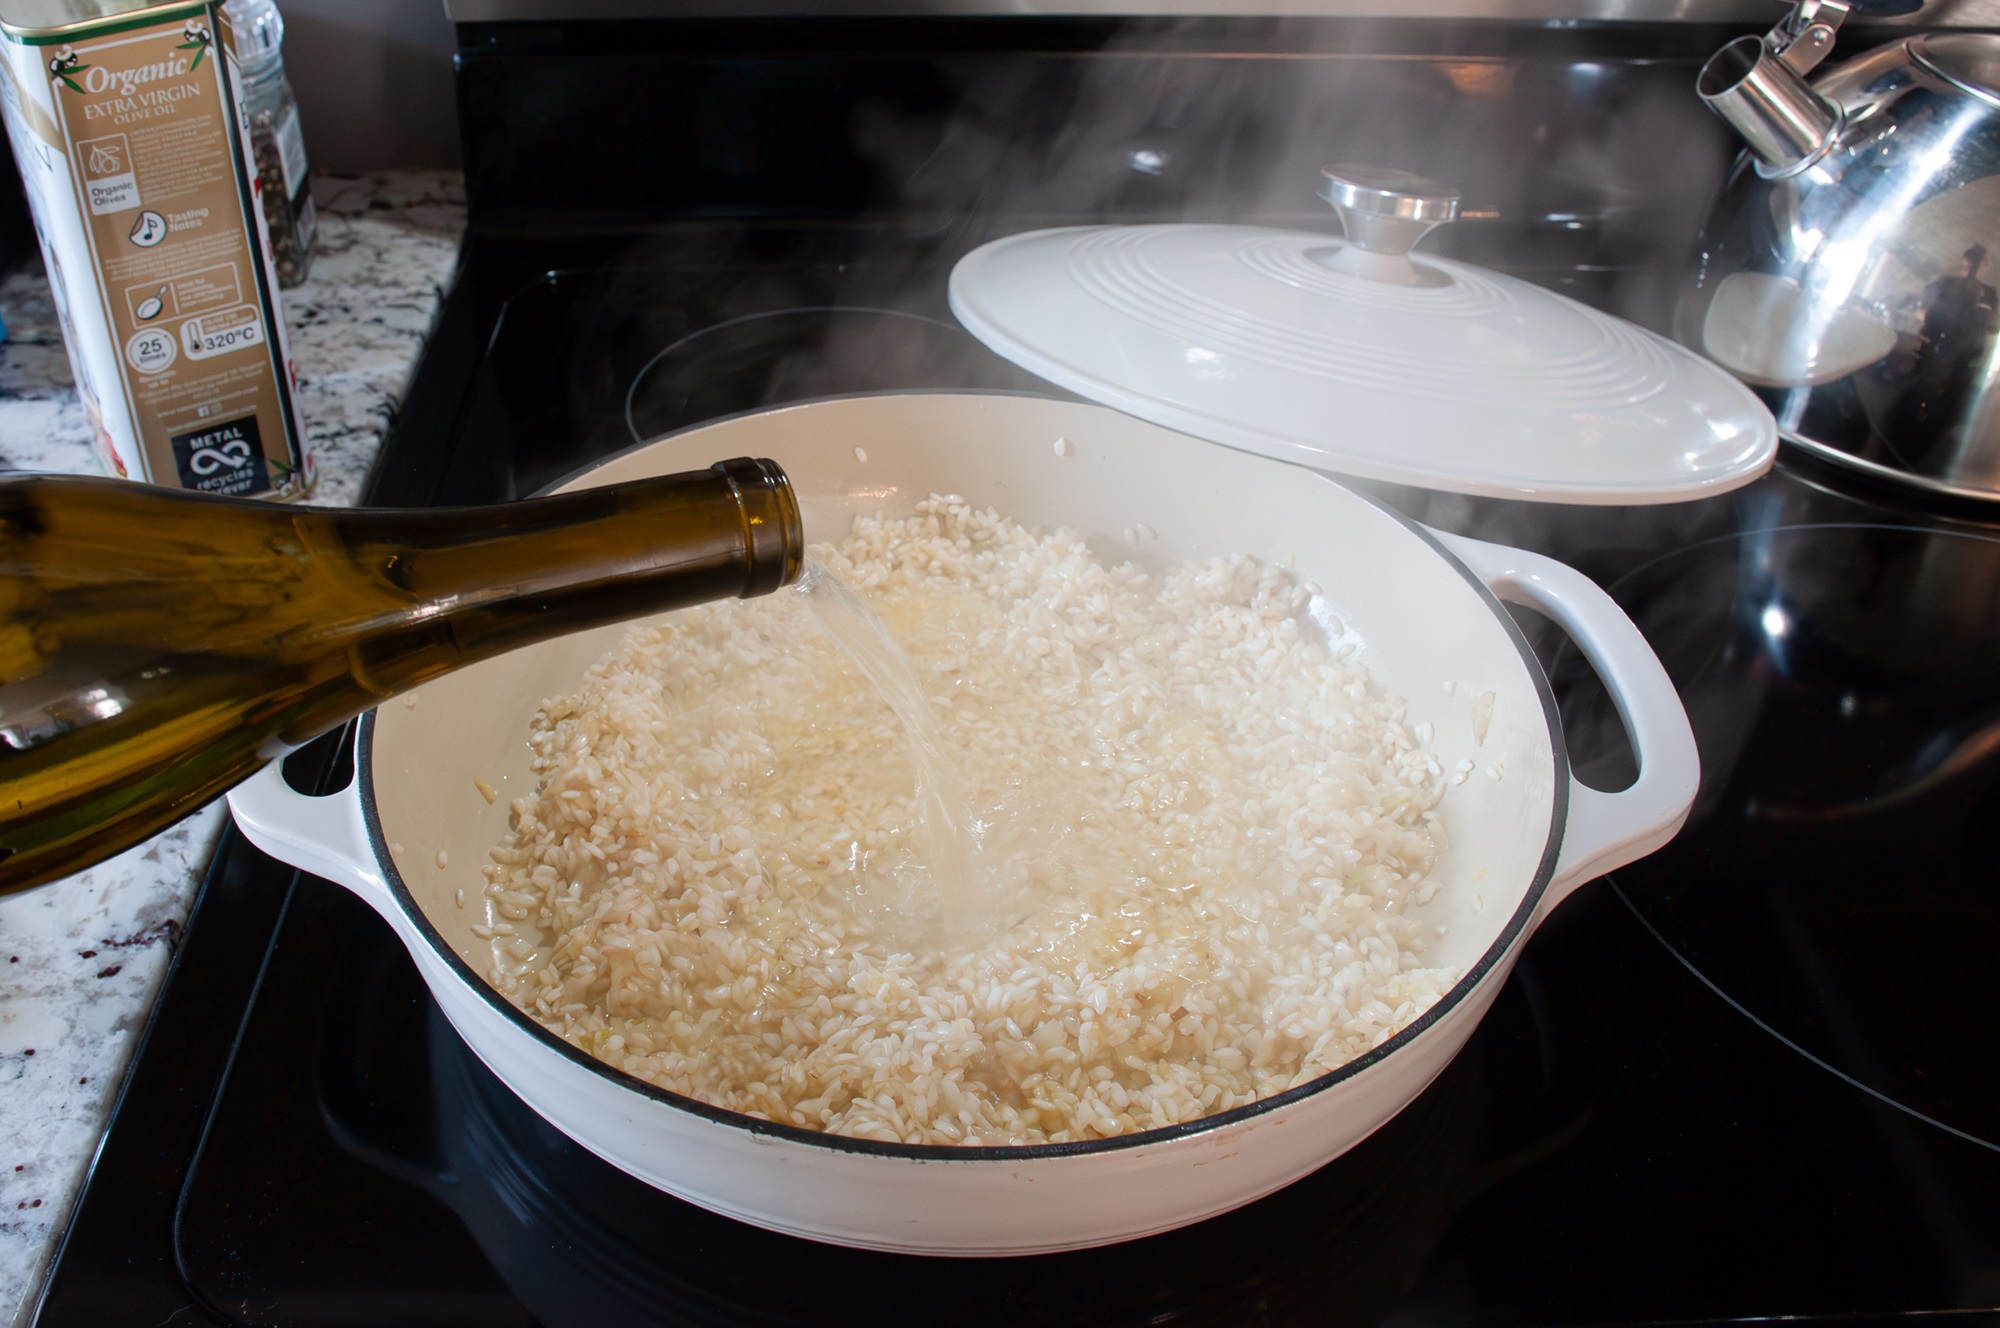
Take olive oil and heat it in a skillet over medium low. Finely chop your shallot and mince your garlic. Slide them into the hot oil and let them become translucent and fragrant before adding in your arborio rice. For a few minutes, let those flavors marry. Then, grab your Williamson Albariño and pour in about a cup and a half to deglaze the pan. Aggressively stir with a wooden spoon and get any stuck on bits from the bottom loosened up and let them join the party. Now you’re beginning the next phase of this recipe.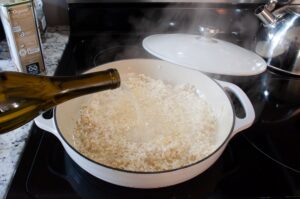 *tip* Arborio rice is a variety of rice rich in starch, which is what causes this dish to be creamy. A real risotto will never have cream added to it. Its creaminess is provoked from each grain as you stir and incorporate more liquid as time goes on.
Once the liquid is 90% depleted (and your rice is beginning to look plumper and creamier) add in another cup to cup and a half of stock. You can use chicken or vegetable – whatever you prefer. Stir, stir, stir. This is where you’ll be for the next 30 minutes: in front of your stove stirring.
As the liquid depletes – replenish. I repeated this step 6 times before my risotto was tender with the slightest of slight toothsomeness. You don’t want the rice to stick in your teeth, and you also don’t want it to be complete mush. Use judgement and taste test along the way.
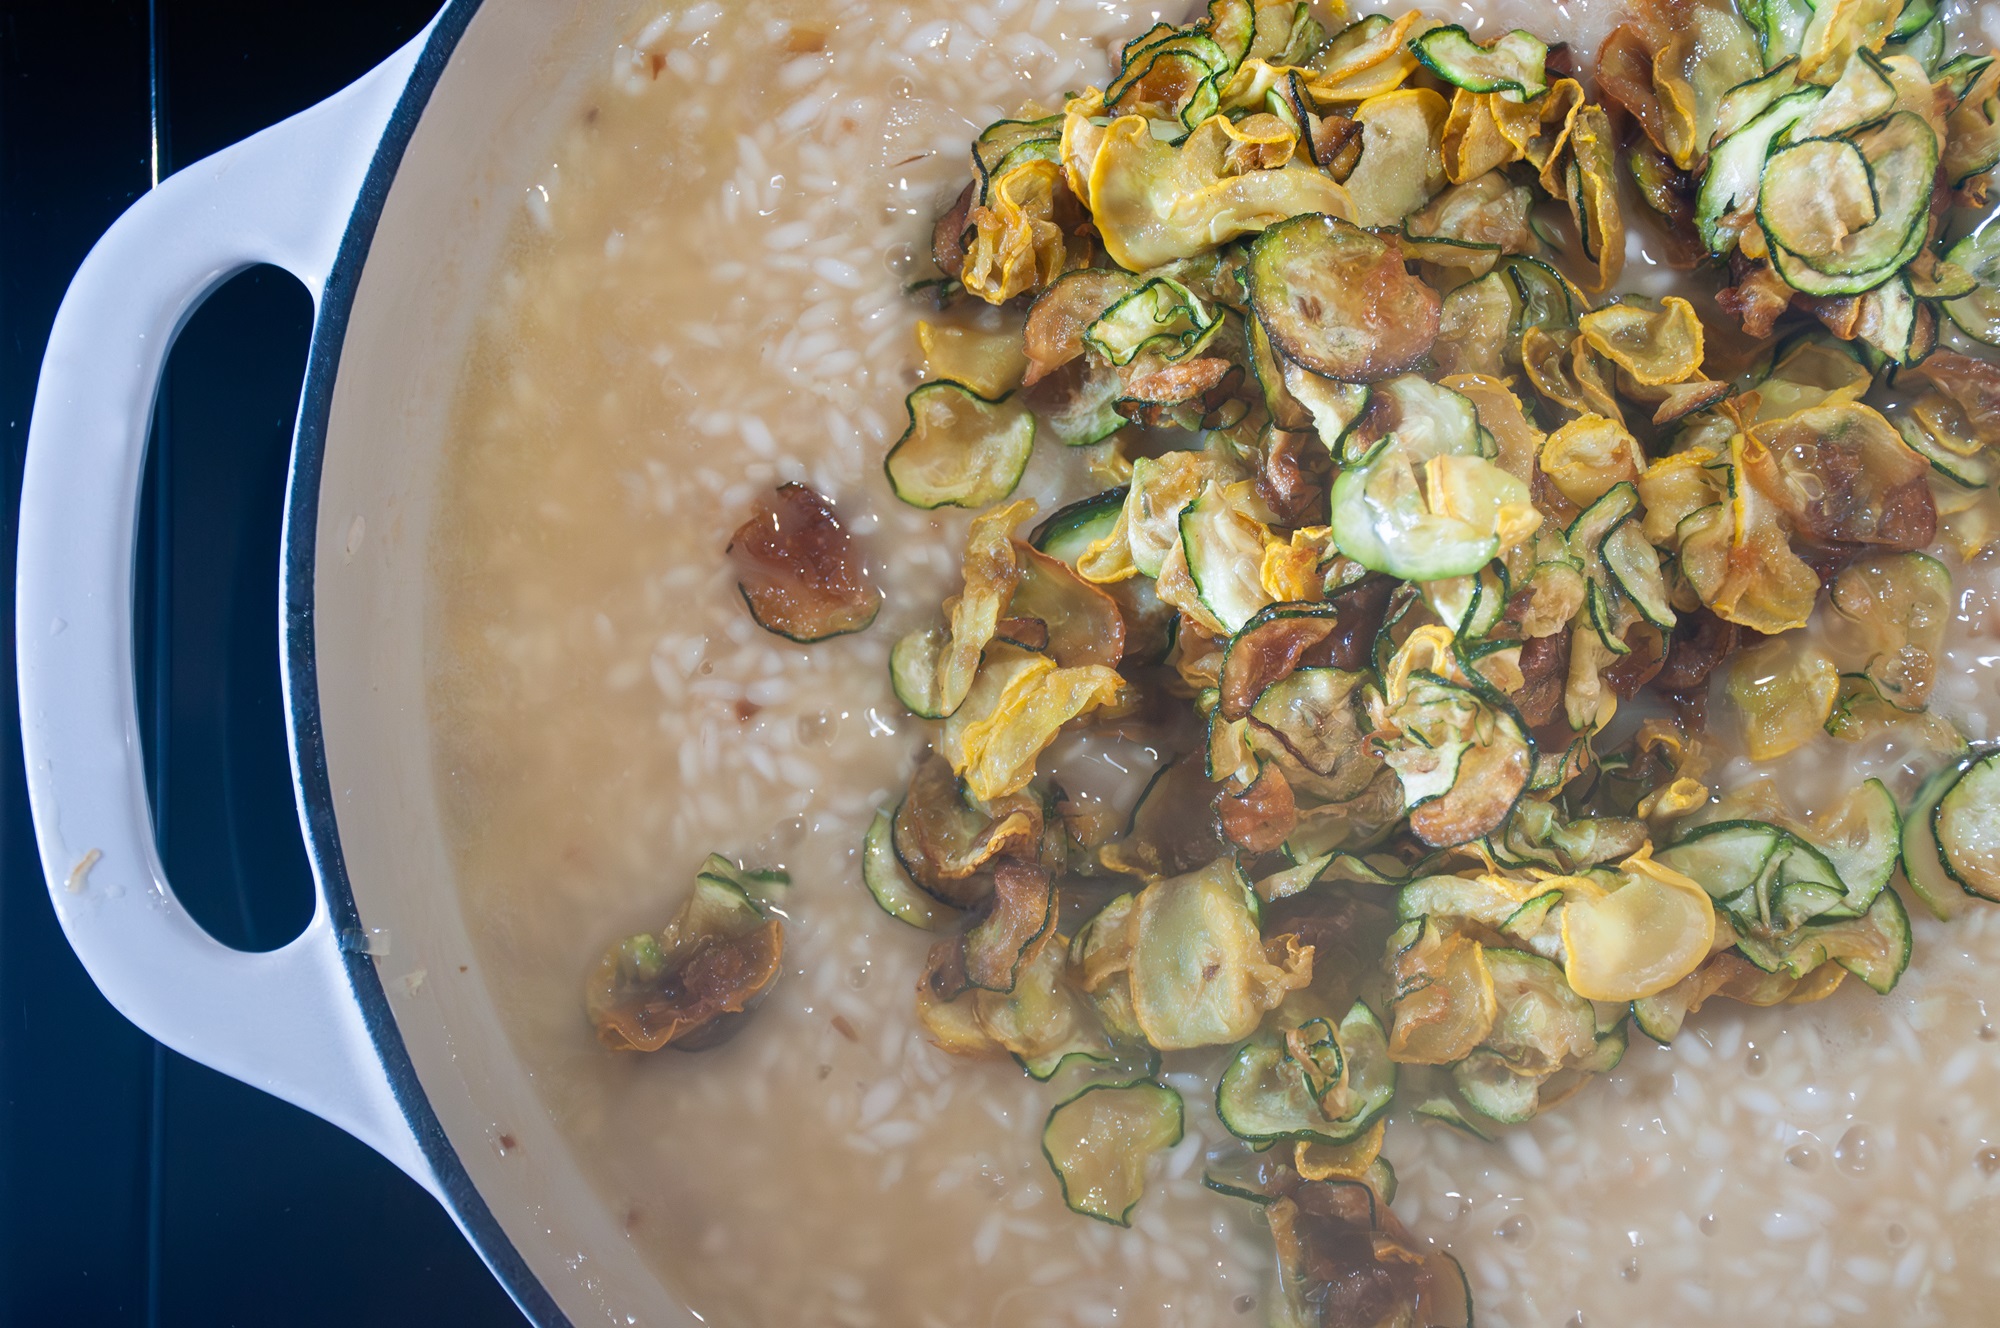
Right when it appears you’re about 85% of the way done with your stock replenishment journey, add in the refrigerated zucchini. Plop it in, add maybe your last or second to last round of stock, and start stirring (again, sorry, I know) but, this is it! “Alexa, play that song about a final countdown or something”.

*tip number two* Don’t salt your risotto. I understand the desire to have a well-seasoned dish – trust me. But the final step is adding parmesan, a very salty cheese, and if you salt your dish and then add a highly salty component, you may discover a disappointment.
Once you’re confident you’ve got a well-cooked risotto preferable to your taste, add in parmesan cheese. I tend to lean toward the “good stuff” for occasions like this, and freshly grated some Parmigiano Reggiano. Add it in, stir (SORRY about the stirring), and taste for salt. I ended up adding a couple pinches of sea salt at the end to make it perfect.
Garnish with additional zucchini (I saved a few delectable pieces), basil, and an additional sprinkling of parmesan. Serve on your favorite plate with a glass of Williamson Albariño, sit back, and enjoy every second of your efforts.
It’s safe to say this meal takes some time. It’s also safe to say it’s worthy of it. We hope you enjoy this week’s Williamson Cork to Fork and the kick off to what will be a fabulous month of recipes highlighting our beloved Albariño.
Cheers!
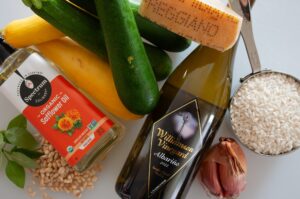
INGREDIENTS
5 medium (7-8 inch) zucchini
1 ½ cups arborio rice
1 ½ cups Williamson Albariño
32oz Sunflower or Safflower oil
1 ½ quarts of stock, vegetable or chicken
2 shallots
3 gloves garlic
3 TBS olive oil
½ cup grated Parmigiano Reggiano plus extra for garnish
Basil for garnish
Salt to taste

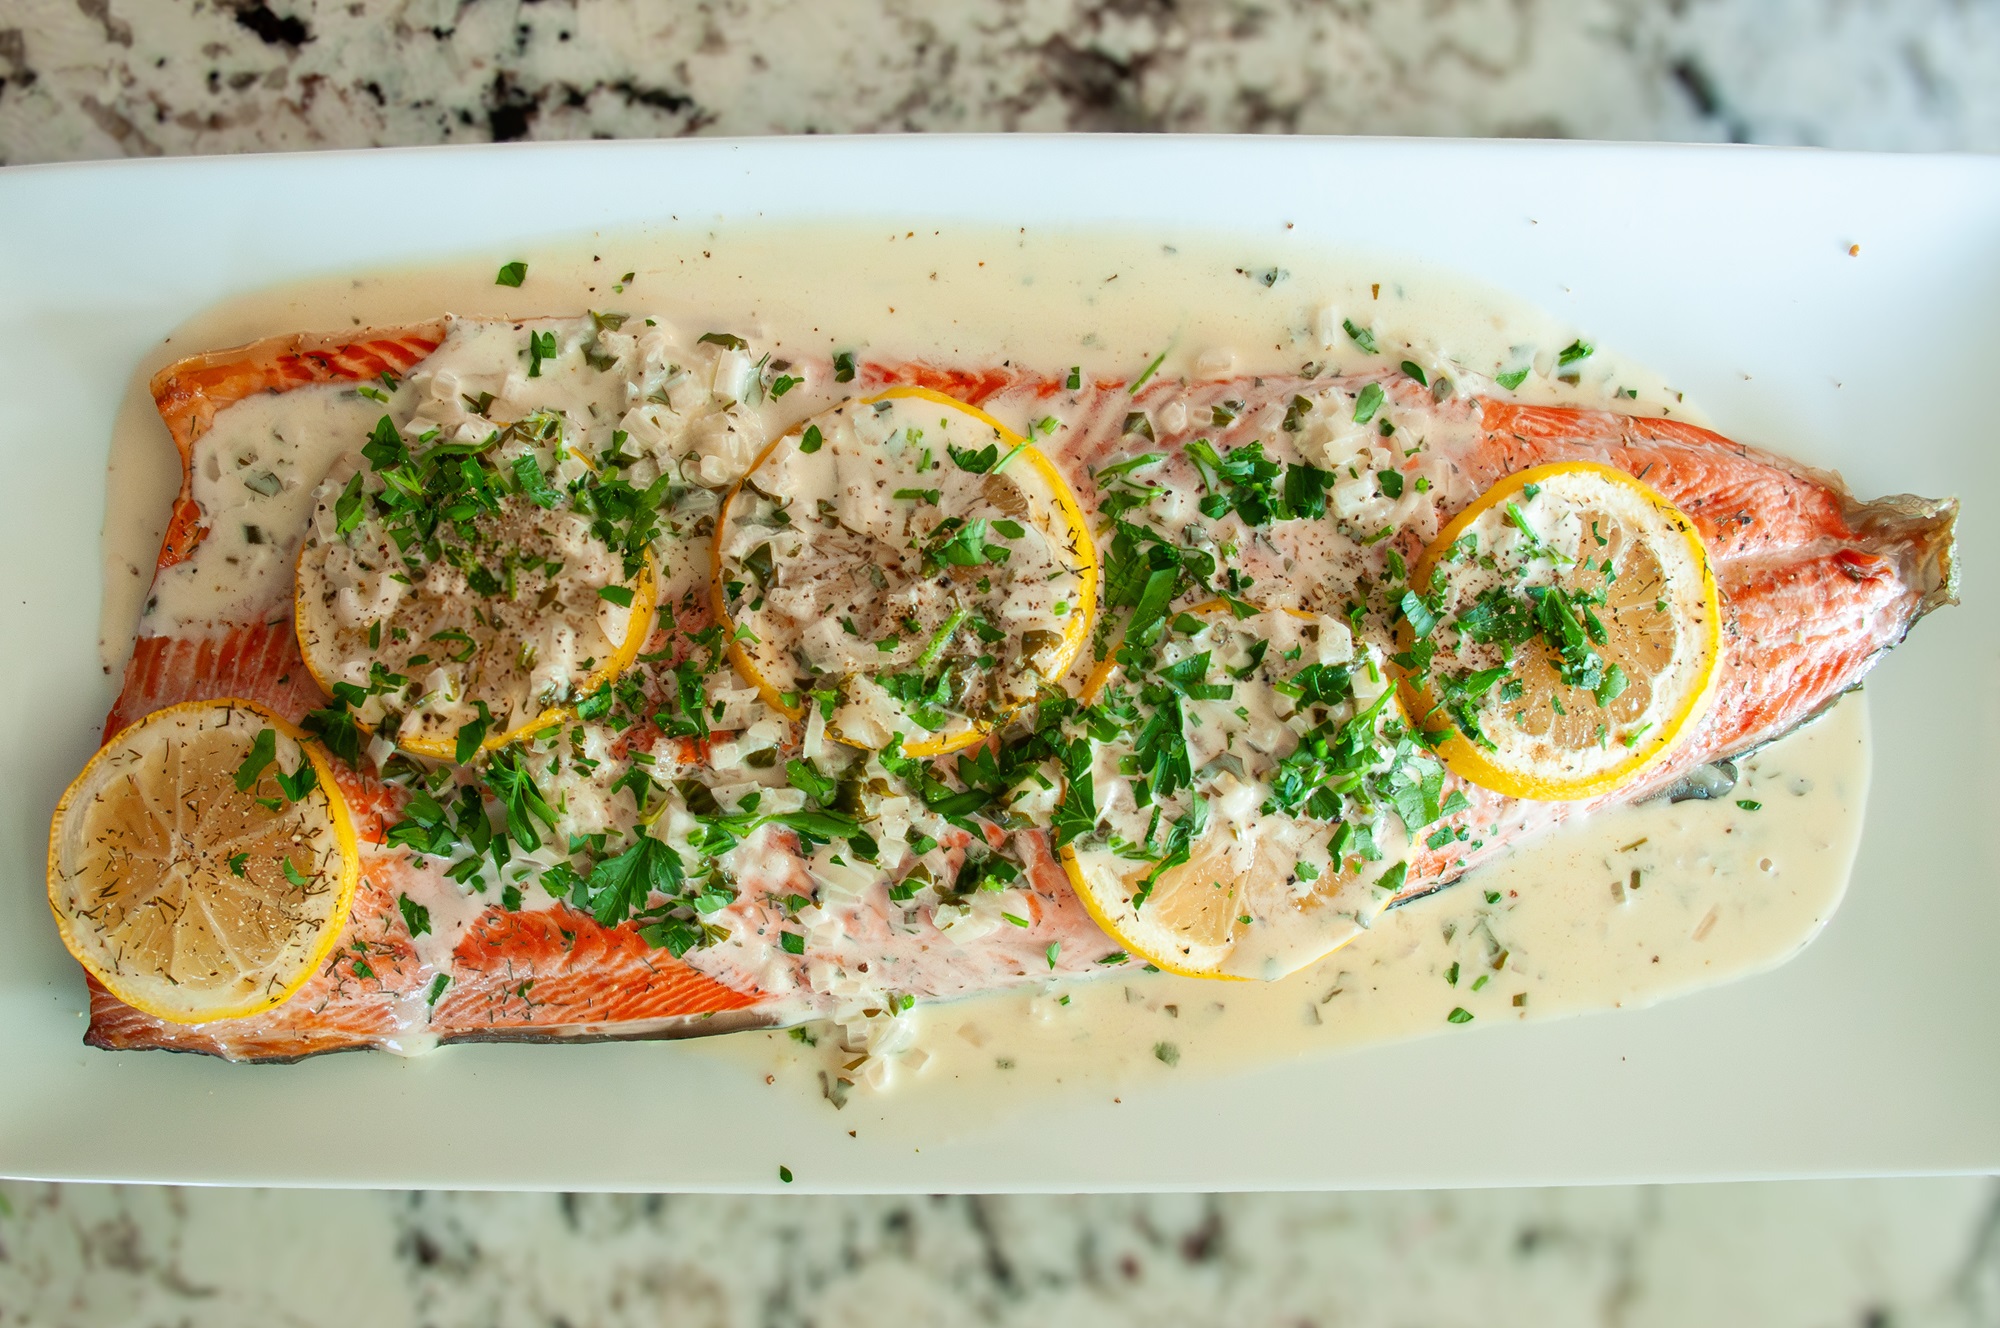
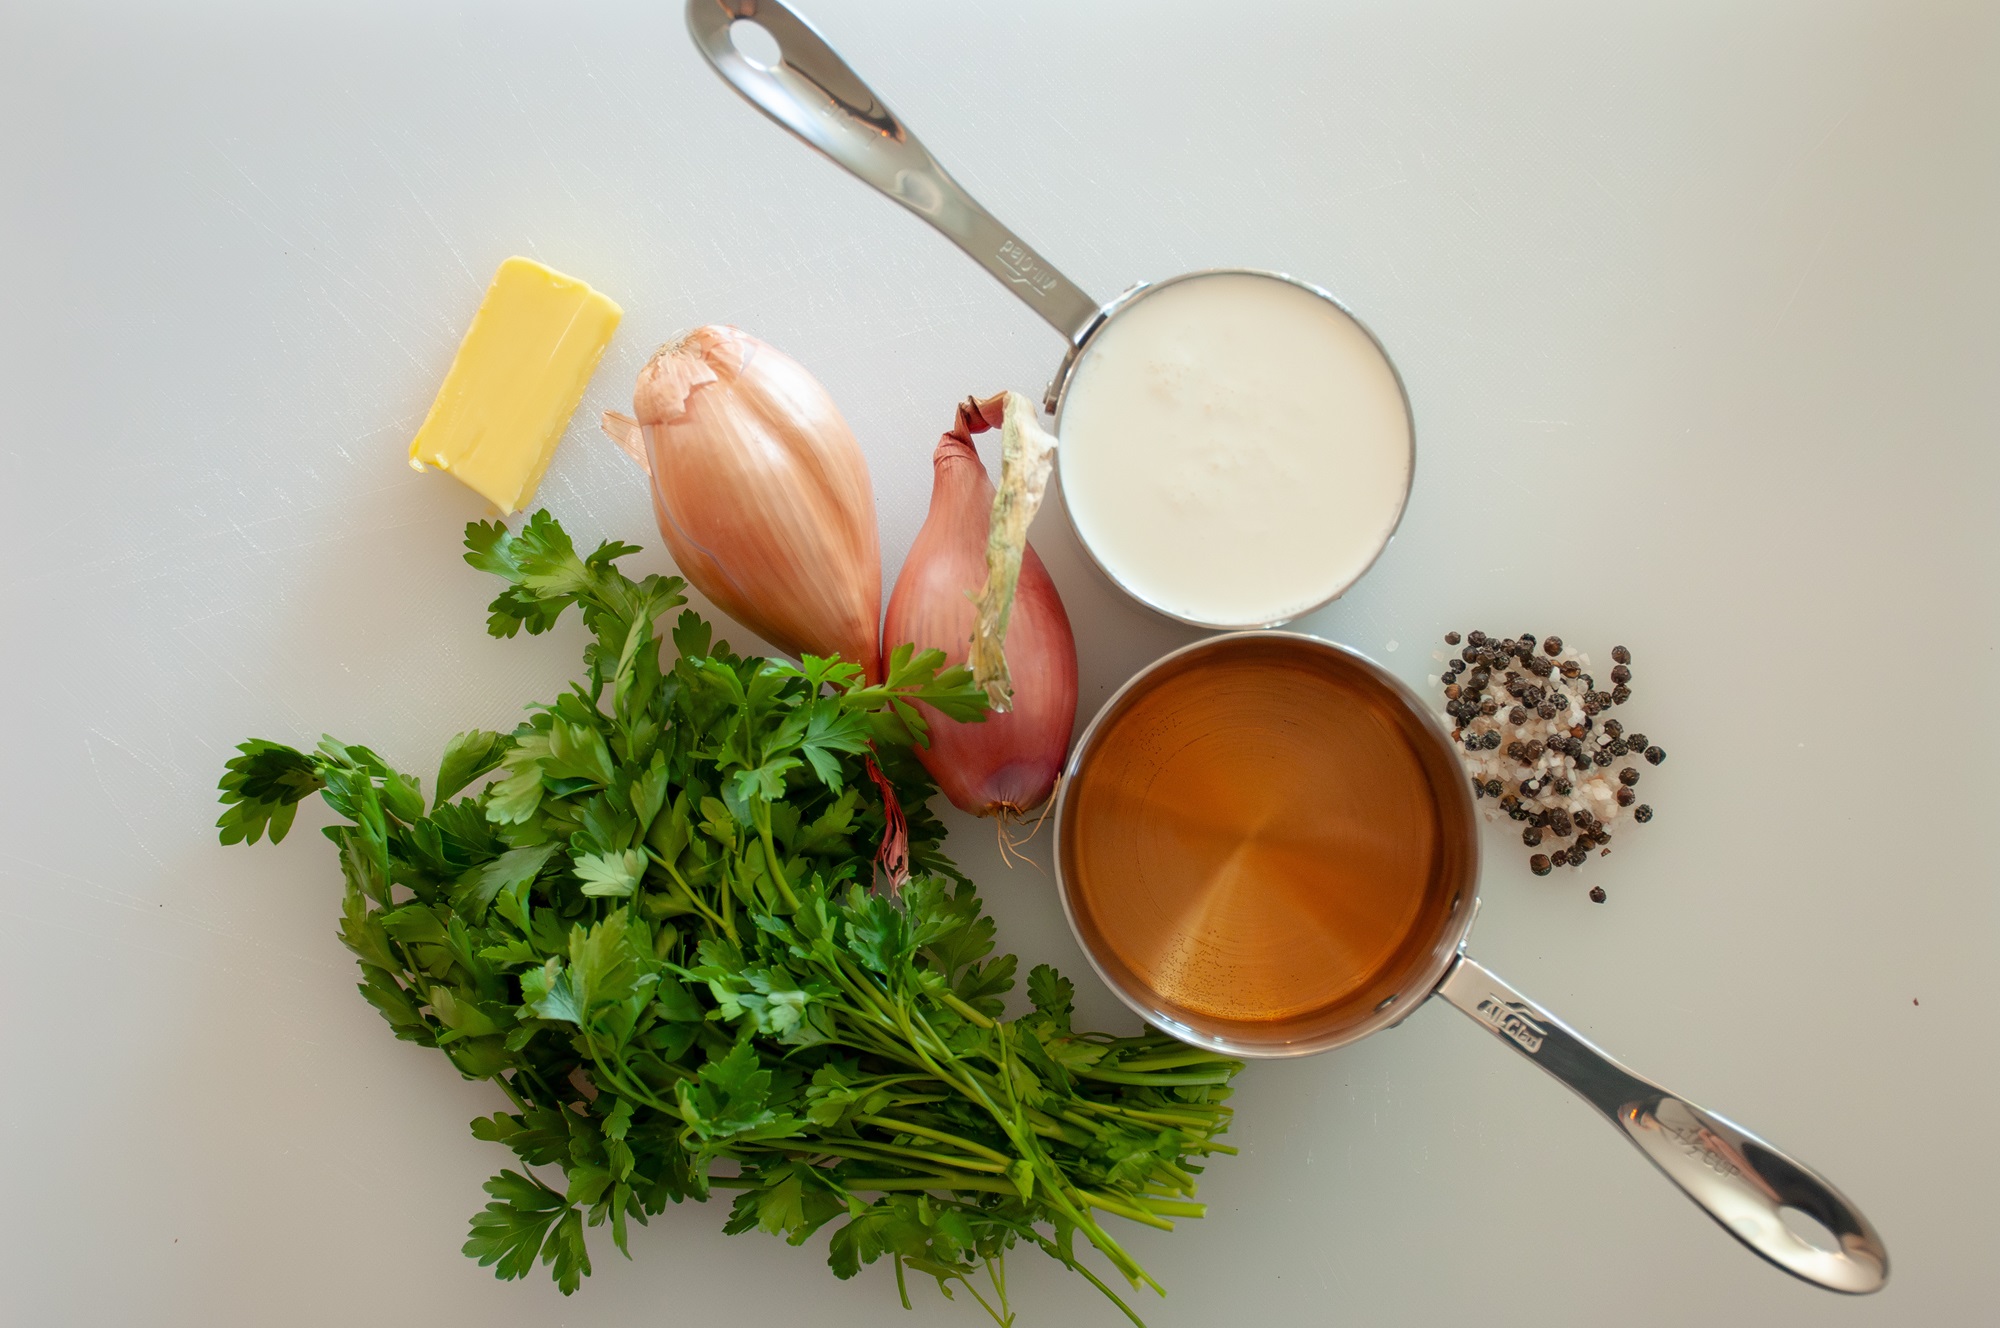
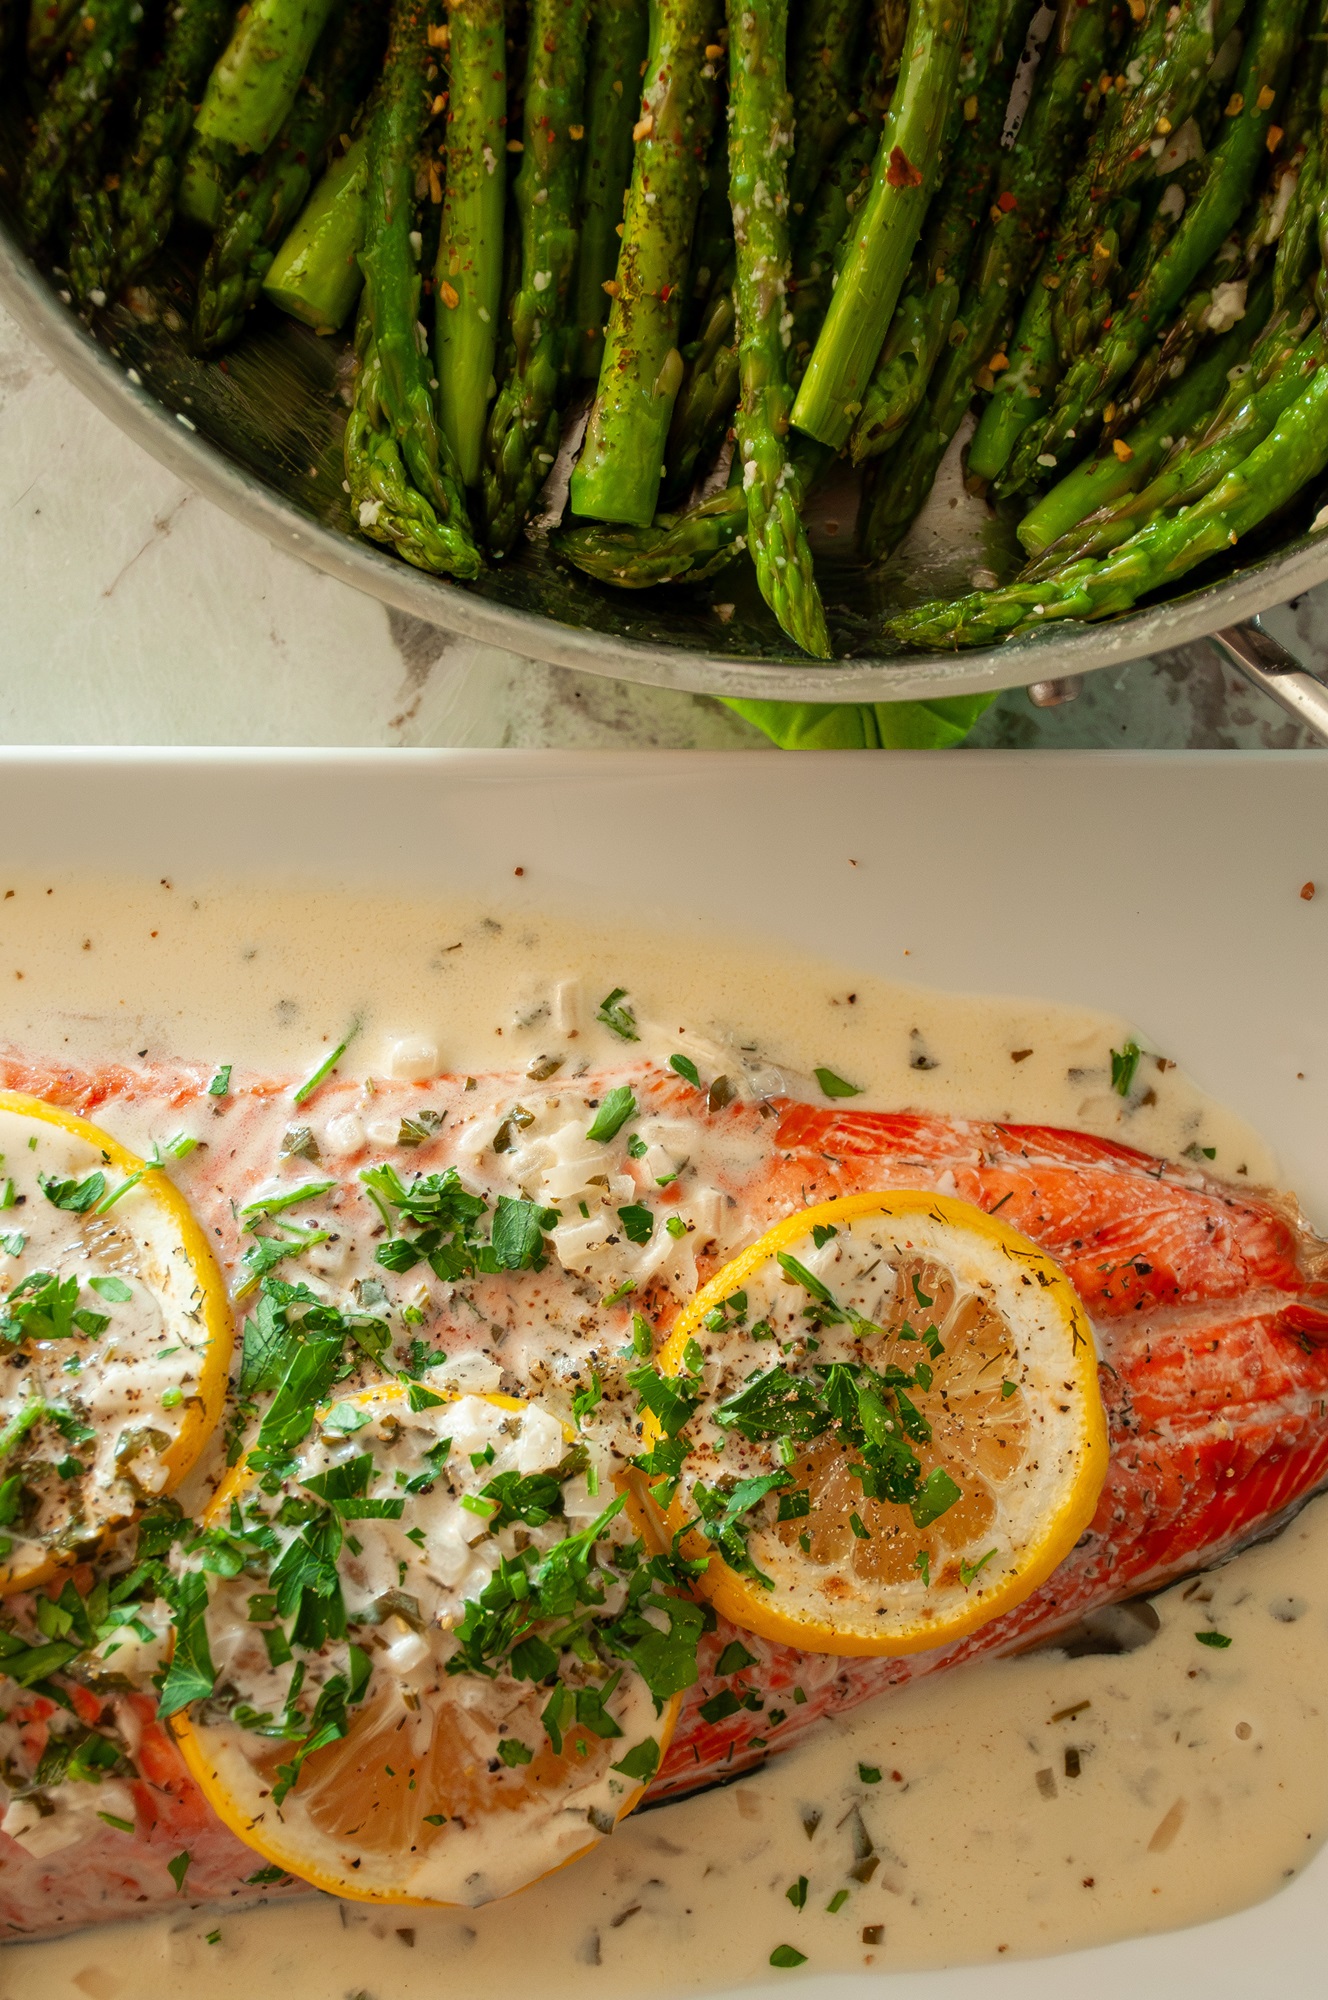
 While the salmon is cooking – we get to start on our Blossom Rosé cream sauce. Melt butter in a sauce pan, add your finely chopped shallots and sauté until fragrant and translucent. Add in the wine, bring up to the rolling boil and reduce by half. This will take a few minutes. Once your sauce has reduced, lower the heat to medium and add in the cream. Season with salt and pepper and let it simmer. We let ours simmer for approximately 5 minutes. It got thick enough to coat the back of a spoon but not glorpy – yes, I said glorpy, we make up our own cooking terms now. Once the sauce is the consistency you prefer, cut the heat and add in chopped parsley (save some for presentation at the end). Just like that, your sauce is done.